Refurbishing or updating the skirting in your home is a satisfying project that can significantly enhance the aesthetic appeal. However, the traditional approach of skirting board replacement can be time-consuming and challenging, particularly for those new to DIY. For UK homeowners looking for a quick, efficient alternative, skirting board covers are the ideal solution. Lightweight, fit-for-purpose, and offering a variety of styles, skirting board covers can transform the look of any room with relative ease. Here’s how you can get started on installing your own cover over skirting board:
Choose the Right Cover for Your Home
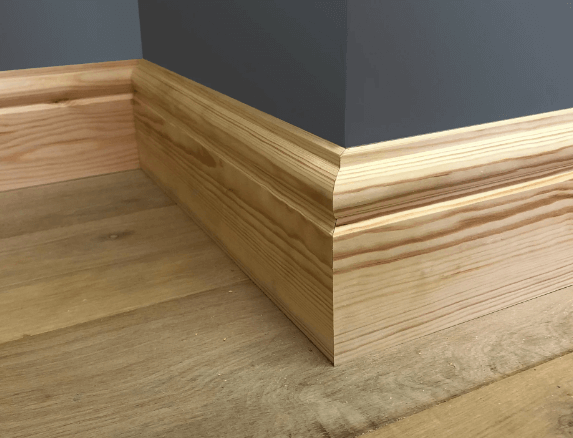
Before you can begin installing skirting board covers, you must select the appropriate style and material that complements your home’s existing decor. Skirting board covers are available in various materials, with high-density polymer being a popular choice due to its durability and flexibility, allowing for easy installation on uneven walls. Additionally, decide on the design profile—flat, grooved, curved, or decorative; ensure it’s in line with your overall interior design scheme.
Prepare Your Tools and Working Area
To get the job done, you’ll need a few essential tools. Ensure you have a tape measure, spirit level, a miter saw or coping saw, a silicone adhesive cartridge, caulking gun, and a pencil to mark your cuts. Clear the working area of any obstructions and remove the existing skirting if necessary. Dust and dirt can affect the adhesion of the skirting board covers, so it’s important to clean the area thoroughly.
Read also Breaking into the DJ Scene: Essential Strategies for Success
Measure Twice, Cut Once
Measuring accurately is the key to achieving a professional finish. Start by measuring the length of the wall where the skirting board cover will be placed. Use the measuring tape to note down the lengths of each wall, as some may require different measurements. Once you have your measurements, transfer them to your skirting board cover material. Remember, it’s always best to cut a board too long than too short.
Cutting and Fitting
Use your miter saw to cut the skirting board covers at a 45-degree angle where two pieces will meet at a corner. If you don’t have a miter saw, a coping saw is a good alternative. Cutting a skirting board cover at a 45-degree angle results in a clean, tight joint. The second part of the cut should follow the profile of the skirting, ensuring a snug fit against the profile of the first board. Dry-fit the skirting board covers to ensure they fit correctly before applying the adhesive.
Installation
When you’re happy with how the skirting board cover will fit, it’s time to fix them in place. Apply a bead of the silicone adhesive along the back of the skirting board cover. Press the skirting board cover firmly against the wall and hold it in place for a minute or two. Work from one end of the wall to the other, fitting each board as you go. If a gap is present, caulk over it once the adhesive has dried for a seamless look.
Finishing Touches
Once all the boards are in place, clean the adhesive residue with a damp cloth. Leave the skirting board covers to dry and set completely. This may take several hours, but be sure to check the manufacturer’s instructions. After the skirting boards are completely dry, paint or stain them to match your interior for a flawless finish.
By following these simple DIY tips, any homeowner in the UK can install skirting board covers and enhance the elegance of their living space. It’s an accessible project that requires little experience and provides a big return on investment in terms of home improvement.